Top Microsoft PowerPoint Tips and Tricks Every Presenter Should Know (Download Free)
Transform your PowerPoint presentations. Discover game-changing tips and tricks including Morph transitions, SmartArt text conversions, Eyedropper color matching, Slide Master, background removal, and live presenter tricks.
Creating engaging PowerPoint slides that captivate your audience doesn't have to require graphic design skills or hours of tedious manual formatting. Microsoft PowerPoint is packed with intelligent design tools, automation features, and secret presentation hacks that can elevate your decks instantly.
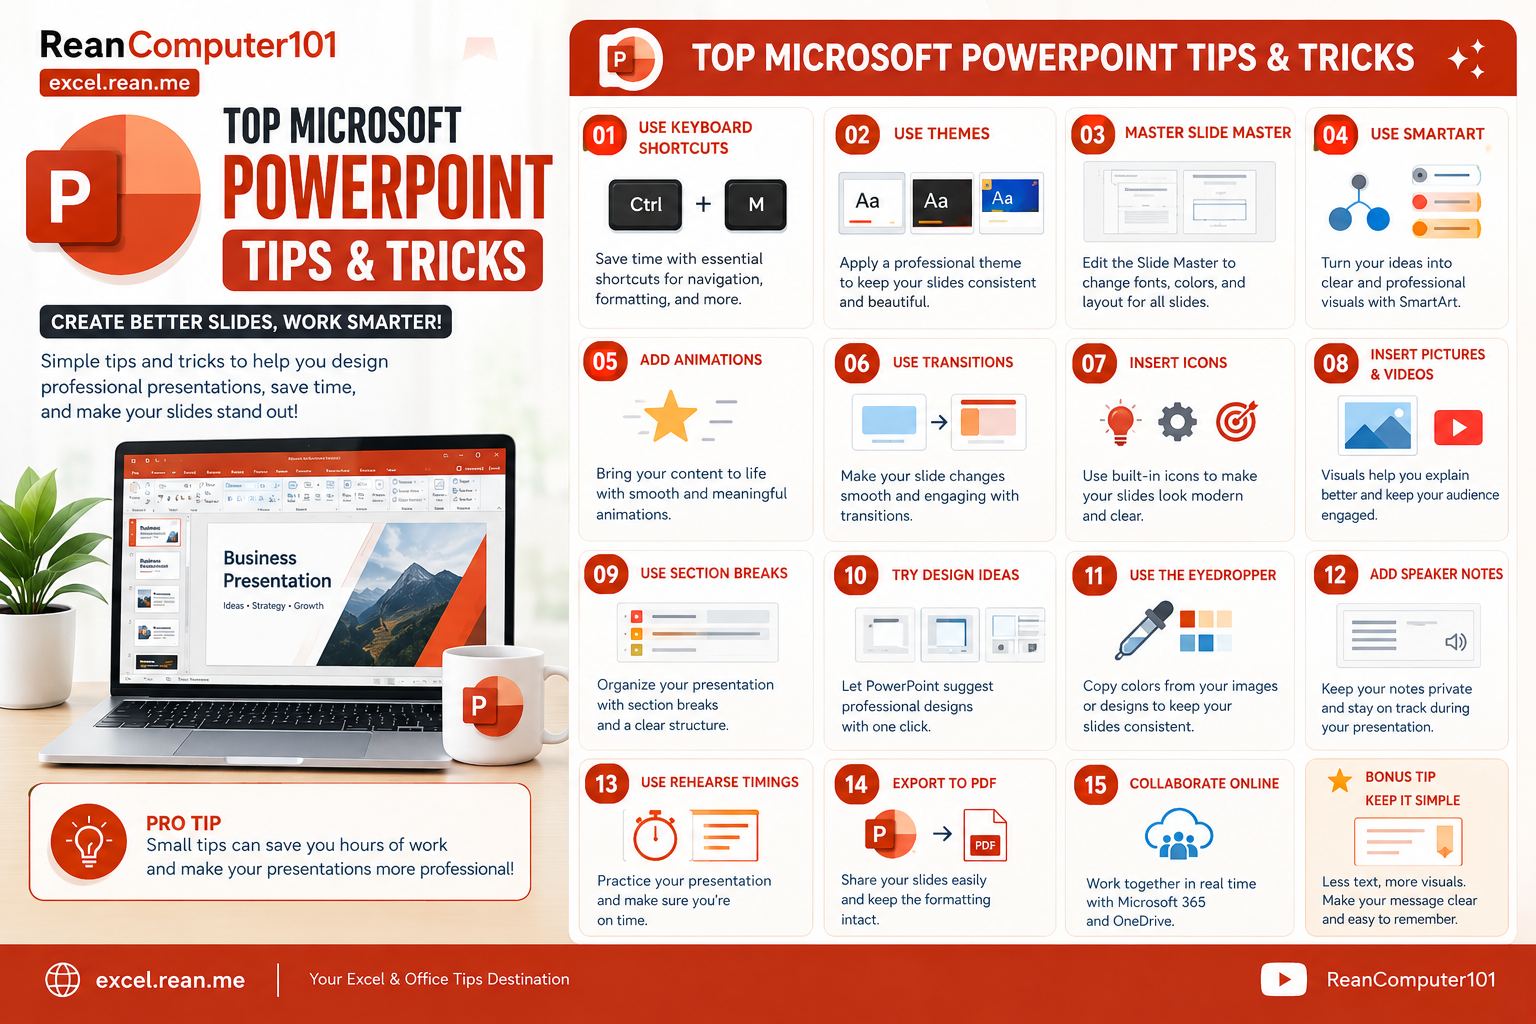 Download High Resolution Image at the end of the post.
Whether you are pitching to clients, lecturing students, or presenting at a team meeting, here are the top Microsoft PowerPoint tips and tricks to design slides faster and present with confidence.
1. Create Seamless Animations with Morph Transition
The Morph Transition is one of PowerPoint’s most impressive modern features. It automatically animates objects, shapes, text, and images moving, resizing, or rotating between two consecutive slides.
- How to use Morph:
- Create a slide with your initial objects or icons.
- Right-click the slide thumbnail on the left panel and click Duplicate Slide.
- On the second slide, move, resize, rotate, or recolor your objects.
- Go to the Transitions tab on the top ribbon and select Morph.
- Play your slide show! PowerPoint seamlessly animates the transformation between both states.
2. Convert Boring Bullet Points to SmartArt Graphics in 1 Click
Blocks of plain bullet points bore your audience. Convert your text lists into professional graphic diagrams instantly.
- Step-by-Step:
- Click inside any bulleted text box.
- Right-click the text (or go to the Home tab).
- Select Convert to SmartArt.
- Hover over the graphic options (process arrows, list blocks, cycle diagrams) and click your favorite!
3. Match Exact Brand Colors with the Eyedropper Tool
No more guessing color hex codes or settling for default palette options when matching company branding or logo colors.
- How to use it:
- Select the shape, icon, or text you want to recolor.
- Go to Shape Fill (or Font Color).
- Click Eyedropper.
- Move your mouse pointer over any logo, image, or website element on your screen and click to sample the exact color!
4. Remove Image Backgrounds Natively (No Photoshop Needed)
You don't need expensive photo editing software to isolate a person, product, or logo from its background image.
- How to remove backgrounds in PowerPoint:
- Select the image on your slide.
- Go to Picture Format > Remove Background.
- PowerPoint automatically highlights the background in magenta.
- Use Mark Areas to Keep or Mark Areas to Remove to refine the edges, then click Keep Changes.
5. Edit Global Slide Styles Once using Slide Master
Stop manually changing logo positions, fonts, or footer disclaimers on every single slide individually.
- How to access Slide Master:
- Go to View > Slide Master.
- Select the top master slide thumbnail on the left.
- Any font change, logo addition, or background color applied here instantly updates across every slide in your entire presentation!
- Click Close Master View when finished.
6. Pause Live Slideshows with Black (B) or White (W) Screen Toggles
During a live presentation, there are moments when you want your audience to look directly at you—not at the screen.
- While presenting in Slide Show mode:
- Press
B(or period.) to turn the screen completely Black. - Press
W(or comma,) to turn the screen completely White. - Press any key again to instantly resume your slide deck!
- Press
7. Duplicate Objects Instantly (Ctrl + Drag or Ctrl + D)
Instead of repeatedly copying and pasting (Ctrl + C & Ctrl + V):
- Method A: Select any shape or text box and press
Ctrl+D. PowerPoint duplicates the object slightly offset. - Method B (Precision Duplicate): Hold
Ctrl(orOptionon Mac), click an object, and drag it. A duplicate is created exactly where you release your mouse!
Tip: Hold
Ctrl+Shiftwhile dragging to constrain the duplicate in a perfectly straight horizontal or vertical alignment line.
8. Align & Distribute Objects Perfectly
Unevenly spaced icons, boxes, or team member photos look amateurish. Let PowerPoint align them automatically.
- How to align shapes perfectly:
- Hold
Shiftand select all objects you want to arrange. - Go to Shape Format > Align.
- Choose Align Center, Align Middle, Distribute Horizontally, or Distribute Vertically.
- PowerPoint recalculates exact equal spacing between every item instantly!
- Hold
9. Create Interactive Non-Linear Presentations with Summary Zoom
Instead of presenting slides linearly from 1 to 20, create an interactive visual dashboard menu that jumps to specific sections dynamically.
- How to create a Zoom menu:
- Go to Insert > Zoom > Summary Zoom.
- Check the initial slides of each section in your deck.
- Click Insert. PowerPoint generates a dynamic visual landing page. During your live presentation, clicking any slide thumbnail zooms directly into that section and returns to the menu when done!
10. Record Video & Audio Narration Directly inside PowerPoint
You can record a complete video walkthrough of your presentation—including webcam video, voiceover, and slide drawing annotations—without third-party screen recording software.
- Go to the Record tab on the ribbon.
- Click From Beginning or From Current Slide.
- Record your presentation and click Export > Export to Video to create a high-quality
.mp4file for YouTube, online courses, or team training!
11. Lock Drawing Tools for Rapid Shape Creation
By default, when you select a shape tool (like a line or arrow) from the insert menu, PowerPoint deselects it after drawing one shape.
- The Trick: Right-click any shape in the shapes menu and select Lock Drawing Mode.
- You can now click and draw as many lines, arrows, or boxes as you want without re-selecting the tool! Press
Escwhen done.
12. Save Slides as High-Resolution Image Files
Need slide graphics for social media posts, blog headers, or email newsletters?
- Go to File > Save As.
- Under Save as type, choose PNG Portable Network Graphics Format or JPEG File Interchange Format.
- Click Save, and select whether to export Just This One slide or All Slides.
Summary Cheat Sheet: Top PowerPoint Tips
| Tip / Trick | Feature Name | Action / Shortcut | Primary Benefit |
|||||
| Smooth Motion | Morph Transition | Transitions → Morph | Animate objects seamlessly between slides |
| Visual Lists | Convert to SmartArt | Right-click text → SmartArt | Turn bullet lists into graphic diagrams |
| Brand Colors | Eyedropper | Shape Fill → Eyedropper | Match exact colors from logos/images |
| Photo Editing | Remove Background | Picture Format → Remove BG | Isolate images without external software |
| Global Styles | Slide Master | View → Slide Master | Edit master layout templates globally |
| Pause Screen | Black/White Screen | Press B or W live | Direct audience focus back to speaker |
| Quick Duplicate | Drag Copy | Ctrl + Drag object | Replicate shapes/text boxes instantly |
| Equal Spacing | Auto Align | Shape Format → Align | Distribute icons with equal margins |
| Visual Menu | Summary Zoom | Insert → Zoom → Summary Zoom | Build interactive, non-linear slide menus |
| Video Export | Presentation Recording | Record tab → Export to Video | Create MP4 walkthroughs with audio |
Download Microsoft PowerPoint Tips and Tricks
👉 📥 Download High Resolution Image
Summary & Next Steps
Transforming your slide decks comes down to practicing a few core features. Start by using Morph Transitions for clean animations, Convert to SmartArt to replace bullet points, and Ctrl + Drag for rapid object duplication today!
📚 Useful Resources
- Essential Microsoft PowerPoint Keyboard Shortcuts Every Presenter Should Know
- How to Print Documents in Word, Excel, and PowerPoint
- Top Microsoft Word Tips and Tricks Every Document Creator Should Know
- Top Microsoft Excel Tips and Tricks Every Spreadsheet User Should Know
- How to Open MS Office Apps Fast via Windows Run Command
- Free Download PDF - Learn Computer, Word, Excel, & PowerPoint (Khmer Language)
Related Tutorials
Opens in new tab ↗Essential Microsoft PowerPoint Keyboard Shortcuts Every Presenter Should Know (Download Free)
Design slides faster and deliver seamless presentations. Master these essential Microsoft PowerPoint keyboard shortcuts for slide navigation, shape alignment, text formatting, and presentation controls.
Top Microsoft Word Tips and Tricks Every Document Creator Should Know (Download Free)
Master Microsoft Word with these essential productivity tips and tricks, including Spike cut-and-paste, random text generation, instant horizontal lines, Quick Parts, vertical box selection, and PDF editing.
Top Microsoft Excel Tips and Tricks Every Spreadsheet User Should Know (Download Free)
Transform the way you work in Excel. Learn powerful time-saving tips and tricks including Flash Fill, Quick Analysis, Transpose, dynamic drop-down lists, AutoSum hacks, and the hidden Camera tool.